When your washing machine fills with water but refuses to spin or drain, the problem often traces back to a small but crucial component — the lid switch. This part ensures that your washer only operates when the lid is safely closed, preventing injury and protecting the motor. When it fails, the entire machine can stop mid-cycle, leaving you with soaking clothes and frustration.
Fortunately, replacing a washing machine lid switch is one of the simplest repairs you can perform at home. It doesn’t require advanced technical skills, just basic tools, patience, and the correct replacement part. This guide explains what the lid switch does, how to recognize when it’s failing, and how to replace it safely to get your washer running like new again.
Understanding the Lid Switch
The lid switch is a small safety sensor located under the top of the washing machine, usually near the lid hinge. Its function is straightforward — it detects whether the lid is closed before allowing the washer to spin or drain.
In older top-loading models, the switch is mechanical. When you close the lid, a small lever presses down on the switch, completing an electrical circuit that signals the machine to start. In modern washers, especially those with electronic controls, the switch may be magnetic or optical, communicating with the control board instead of relying on physical pressure.
Without a functioning lid switch, your washer believes the lid is open. That safety mechanism prevents the motor from running, so replacing the switch restores the full operation of your appliance.
Symptoms of a Faulty Lid Switch
A broken or failing lid switch can produce several recognizable symptoms. The most common is when the washer fills with water but doesn’t proceed to the spin or drain cycle. In some cases, it may pause during the wash and never resume. You might also notice that closing the lid no longer produces the usual clicking sound, or the indicator light on electronic models fails to come on.
Occasionally, the washer may even stop mid-cycle and remain unresponsive until you lift and close the lid repeatedly. These behaviors can be misleading because they mimic motor or control issues, but the lid switch is often the simplest and cheapest fix.
Preparing for the Replacement
Before starting any appliance repair, safety is your top priority. Always unplug the washer from the electrical outlet to eliminate the risk of shock. If your machine is connected directly to a circuit breaker, turn off the power at the panel.
Move the washer slightly away from the wall to give yourself space to work. Keep a small container nearby to hold screws and clips, and have a towel ready in case of accidental water drips. You’ll typically need a screwdriver, a nut driver, and possibly a flat tool to release hidden clips on the top panel.
Finding and Removing the Lid Switch
In most top-loading washing machines, the lid switch sits just below the top surface near the lid opening. To access it, start by lifting or removing the control console. Depending on your washer’s model, the panel may be held by screws at the back or by spring clips at the sides. Once loose, tilt it forward carefully to expose the wiring harness.
You’ll see a group of wires connecting the lid switch to the control area. Disconnect these by pressing the release tab and gently pulling them apart. If you’re unsure about the orientation, take a quick photo before disconnecting anything — it will help when reconnecting the new part.
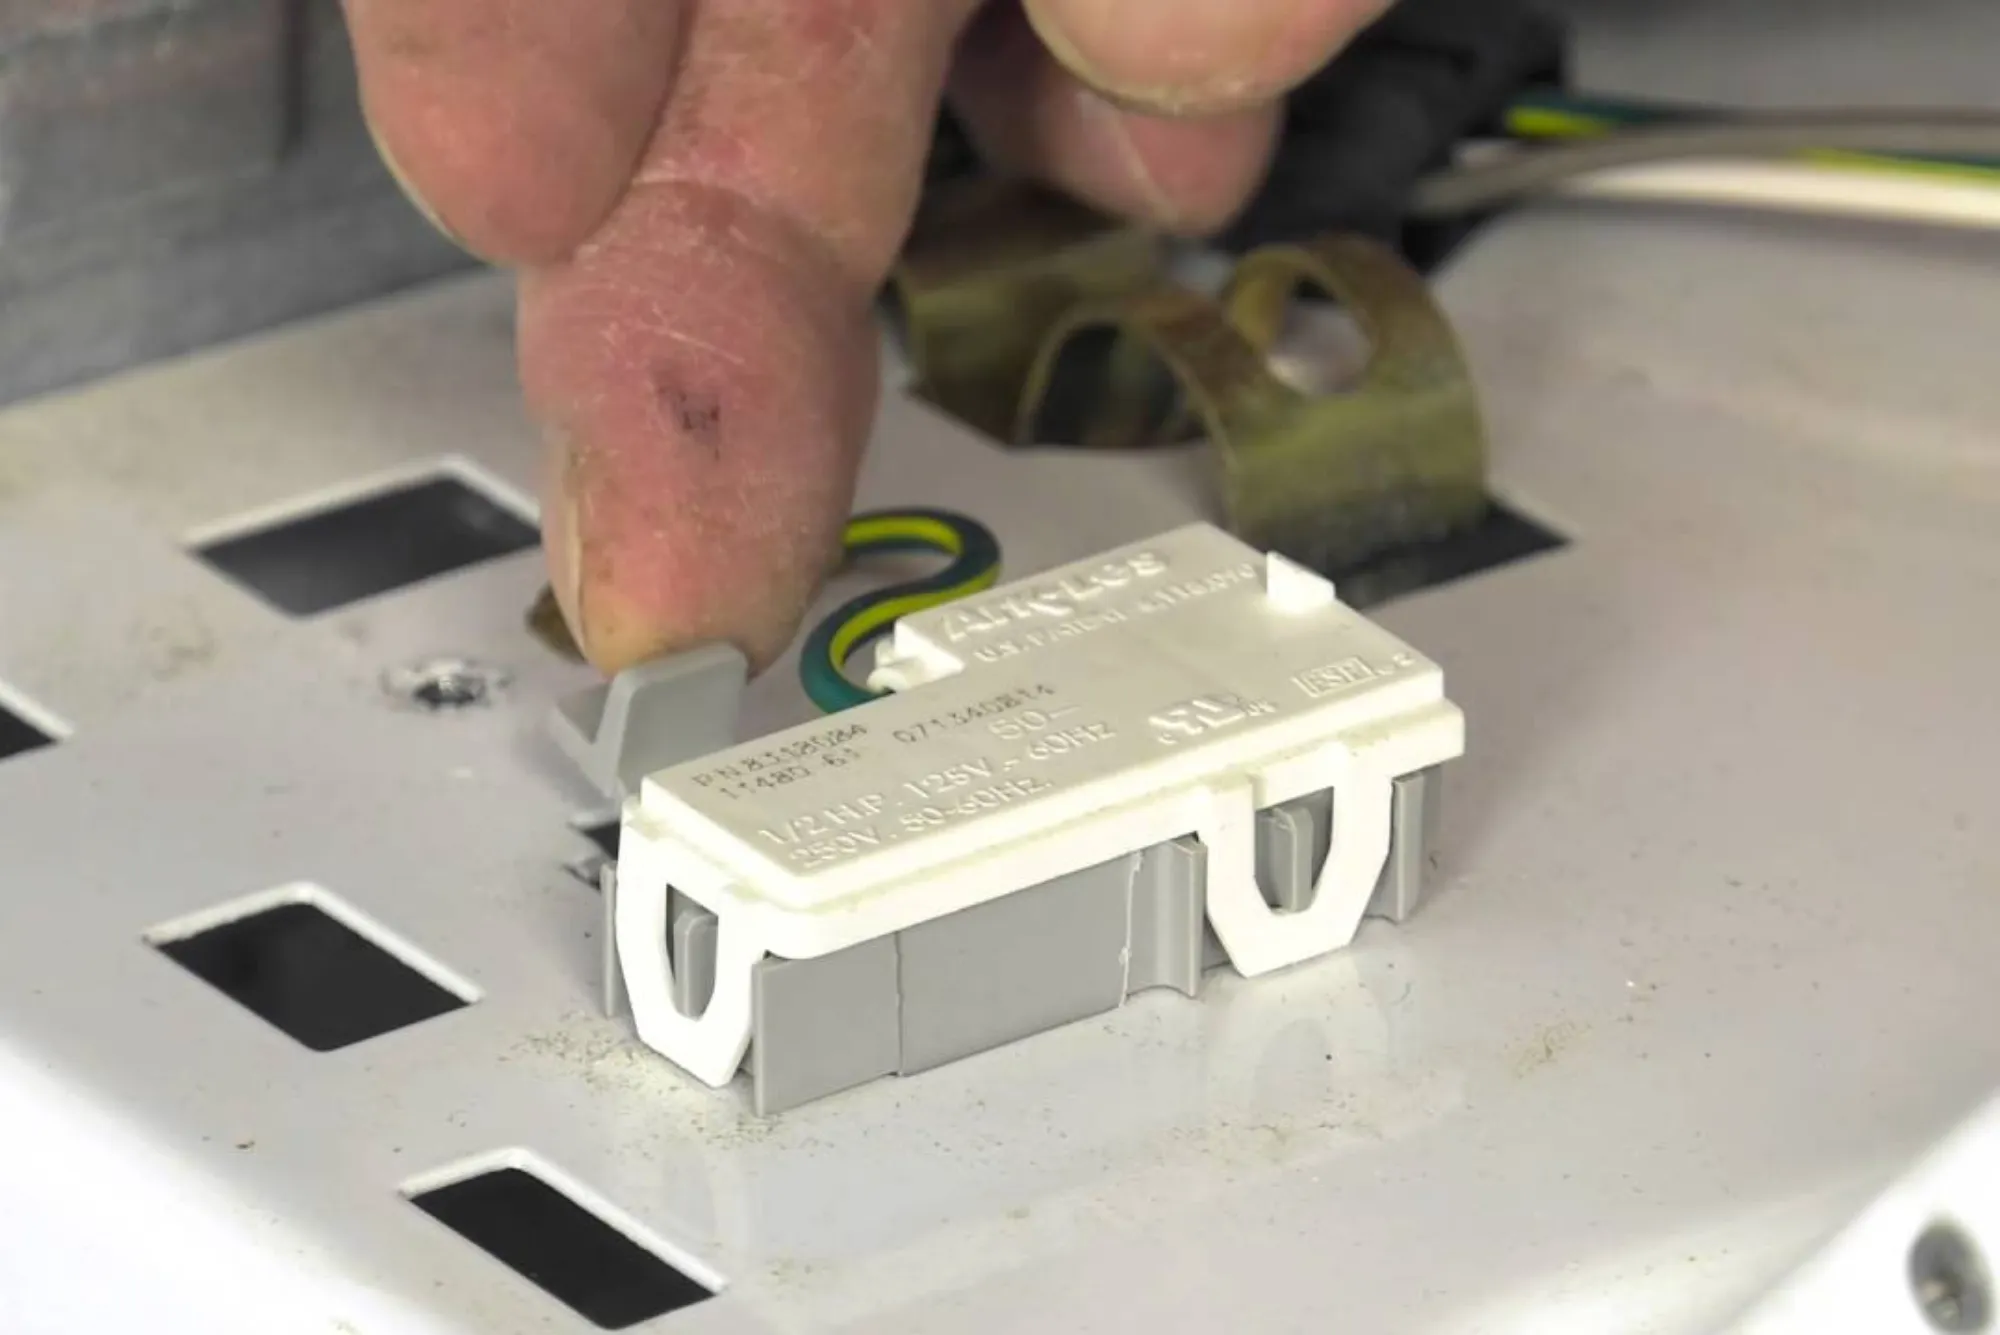
Next, open the lid and locate the mounting screws or brackets that secure the switch. Remove them, noting how the switch aligns with the lid’s striker or actuator. Once everything is detached, lift the old switch assembly out of the washer.
If you notice broken plastic, burn marks, or corrosion on the contacts, those are clear signs the switch has failed and needs replacement.
Installing the New Lid Switch
Take your new lid switch and compare it to the old one. The connectors and mounting holes should match exactly. If they don’t, you may have the wrong part number. It’s important to use a switch designed for your washer’s specific brand and model to ensure compatibility.
Install the new switch in the same position, using the existing screws or clips. Make sure the actuator or lid strike lines up perfectly — if it’s misaligned, the washer will still think the lid is open. Once the switch is secured, reconnect the wiring harness. The connectors should click into place without force.
Before reassembling the washer, it’s smart to test the switch. Close the lid and listen for the click. If you have a multimeter, check for electrical continuity when the lid is closed — there should be a complete circuit. If it tests correctly, you’ve installed it properly.
Reassembling and Testing the Washer
After confirming the switch works, reattach the top panel or control console and tighten all screws. Plug the washer back into the outlet and run a short test cycle without clothes. When you close the lid, the machine should immediately recognize it and proceed through the wash, spin, and drain stages normally.
If the washer still doesn’t start or spin, double-check that the switch is firmly connected and aligned. Sometimes the lid striker—the small piece that presses the switch—can be slightly out of place, preventing the sensor from engaging.
Troubleshooting After Replacement
If the machine still doesn’t respond after replacing the switch, the problem may lie elsewhere. A damaged wiring harness, misaligned lid hinge, or defective control board can interfere with the signal between the switch and the washer’s main system. In newer models with electronic lid locks, a broken magnet or solenoid might also be the cause.
You can test the wiring with a multimeter to ensure power is reaching the switch. If all wiring checks out, it’s best to consult a qualified appliance technician to inspect the control board or motor assembly.
Cost, Time, and Benefits
Replacing a washing machine lid switch is a quick and affordable repair. The replacement part typically costs between $25 and $60, depending on the brand and model. The entire process usually takes less than an hour for a do-it-yourselfer.
Even if you hire a professional, the total repair cost is modest compared to replacing the washer. Most technicians charge between $100 and $150 for parts and labor. That’s a small investment to restore full performance and avoid the expense of buying a new appliance.
Beyond cost savings, replacing the lid switch maintains your washer’s built-in safety mechanism. The switch prevents the spinning drum from operating when the lid is open, protecting you from injury and keeping your machine running within manufacturer safety standards.