Refrigerant leaks are a common yet critical issue in air conditioning and refrigeration systems. A leak can compromise the cooling efficiency of your HVAC system, increase energy consumption, and even damage vital components like the compressor. Understanding how to identify and repair these leaks is crucial for maintaining both system performance and safety. This guide explains the process of detecting and repairing refrigerant leaks in a professional, step-by-step manner.
Why Detecting Refrigerant Leaks Is Essential
Refrigerant serves as the lifeblood of any cooling system, facilitating heat exchange and maintaining comfortable temperatures. When a leak occurs, the system loses refrigerant, which reduces its ability to cool effectively. Over time, a leaking system may experience higher electricity consumption because the compressor works harder to achieve the desired temperature.
Beyond operational concerns, leaks pose environmental and safety risks. Many refrigerants are harmful to the ozone layer or have high global warming potential. Undetected leaks not only damage the system but also contribute to environmental pollution. Early detection and repair protect your investment while ensuring eco-friendly operation.
Causes of Refrigerant Leaks in Cooling Systems
Several factors can cause a refrigerant leak in an air conditioning or refrigeration system. Corrosion in copper lines is a leading reason, often caused by exposure to moisture or airborne chemicals. Over time, this corrosion creates pinhole leaks that release refrigerant gradually.
Another common cause is loose connections or fittings. Vibrations from the running compressor can loosen joints and flare fittings, allowing refrigerant to escape. Poor installation practices, physical damage from accidental impact, and manufacturing defects can also lead to leaks.
Identifying the root cause of a leak is as important as repairing it. Without addressing the underlying issue, the problem is likely to return, causing repeated energy loss and equipment strain.
Early Signs of a Refrigerant Leak
Recognizing a refrigerant leak early can prevent significant damage. A common sign is a noticeable reduction in cooling performance. When the refrigerant level drops, the system struggles to reach the set temperature, and indoor comfort declines.
Another indicator is ice formation on the evaporator coils or refrigerant lines. Low refrigerant levels cause a drop in coil temperature, leading to condensation freezing. Unusual sounds, such as hissing or bubbling, can also signal escaping refrigerant. Over time, a leak may cause the compressor to overheat,Refrigerant Leaks, resulting in increased energy bills and reduced system lifespan.
Being aware of these early signs allows you to schedule inspection and repair before the issue worsens.
Professional Methods for Detecting Refrigerant Leaks
Detecting a refrigerant leak requires both careful inspection and the use of specialized tools. While visual examination may reveal oil stains or frost where refrigerant is escaping, professional techniques provide more reliable results.
One of the most widely used methods is the soap bubble test. A technician applies a soap-water solution to suspected leak points, and bubbles appear where gas is escaping. This method is simple but effective for accessible leaks.
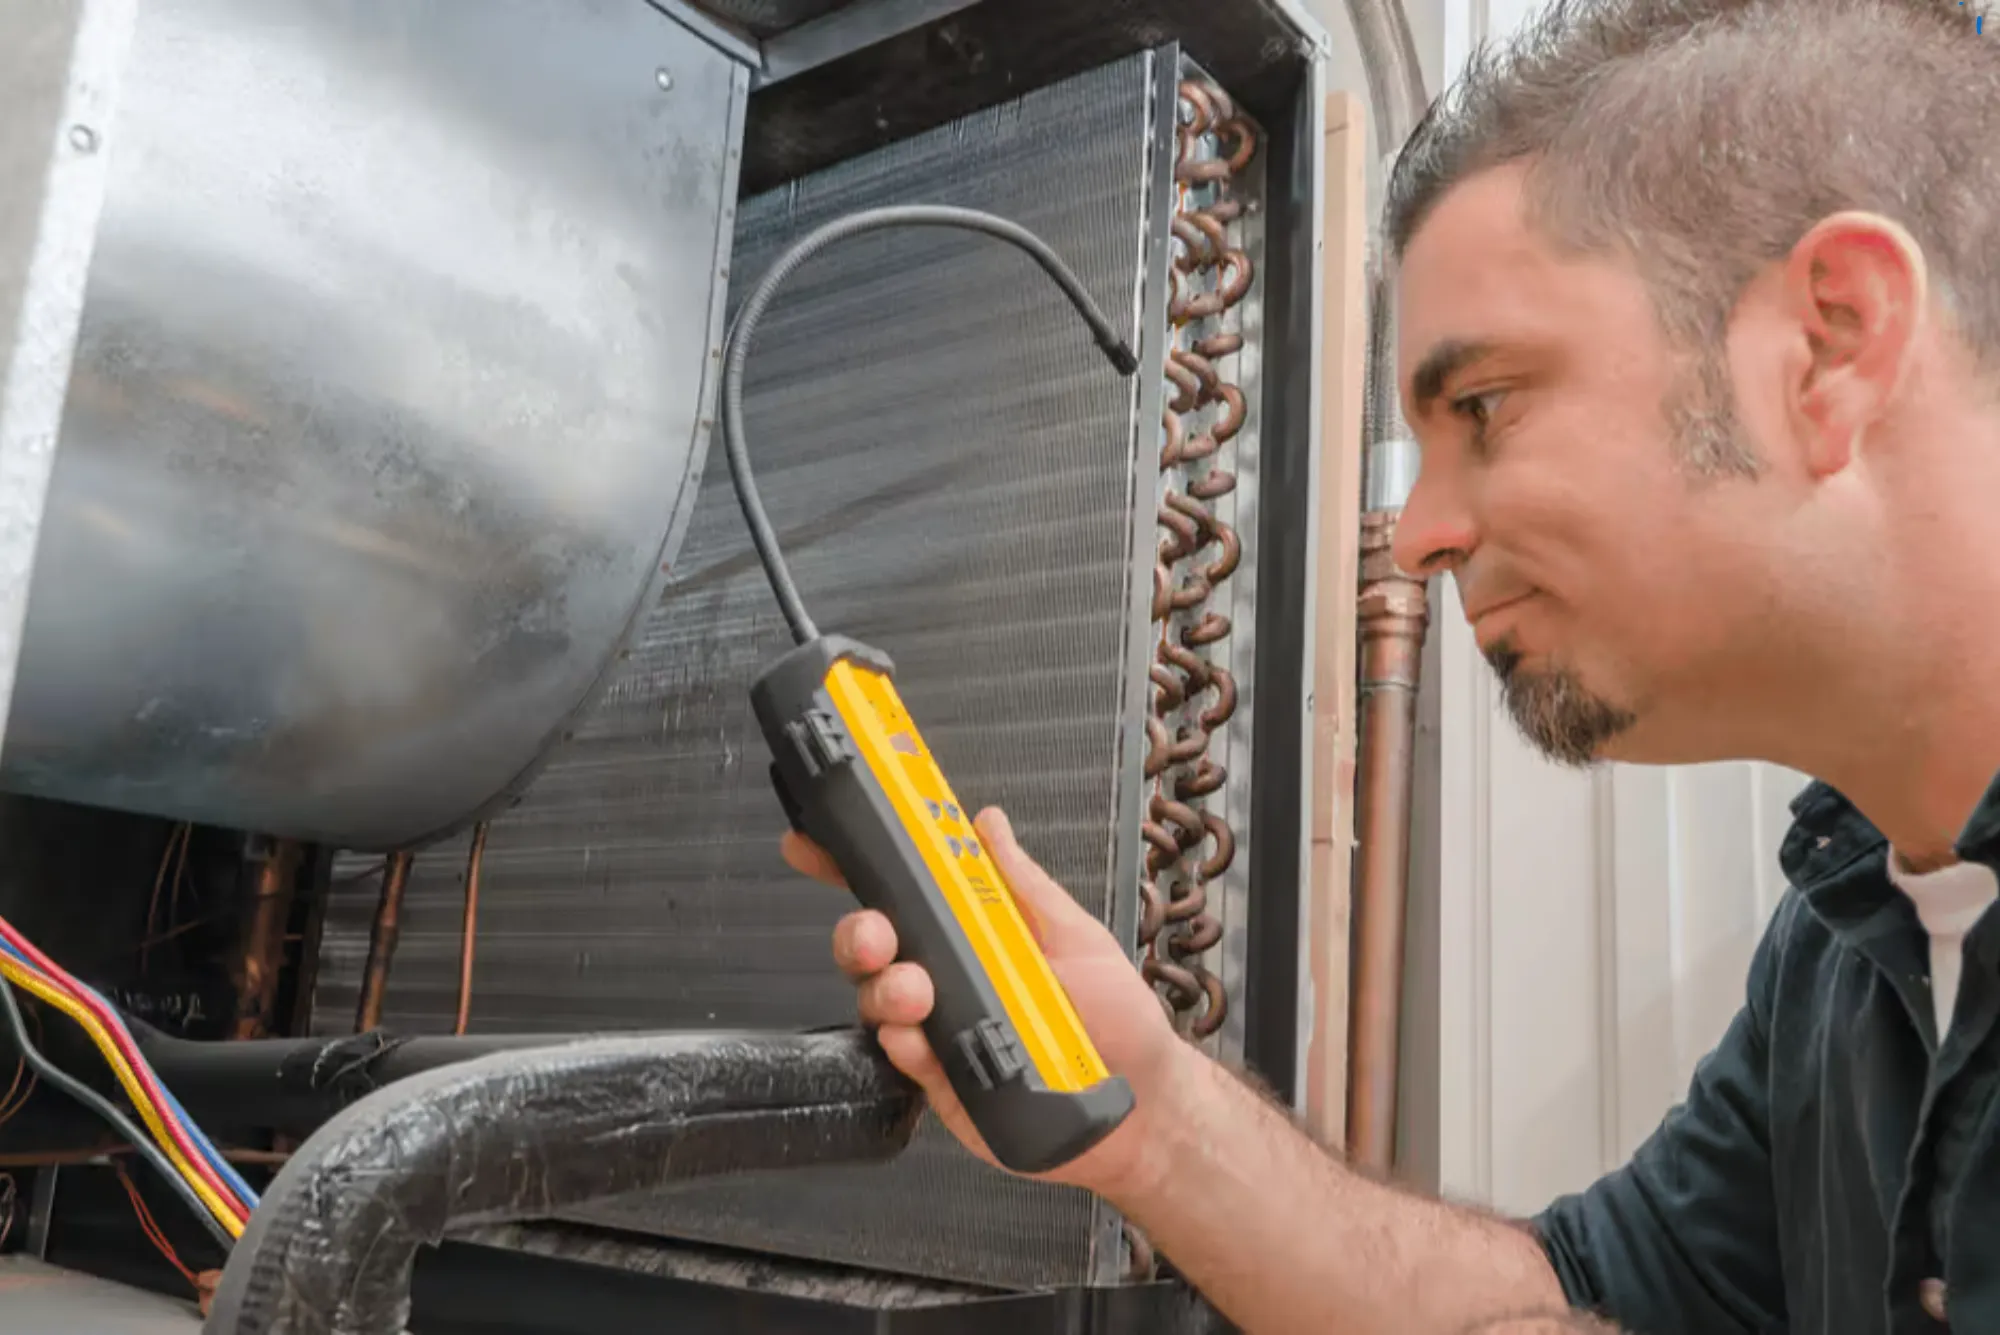
Another professional tool is the electronic leak detector, which senses refrigerant concentration in the air and emits a sound or light signal when a leak is found. These devices are highly sensitive and can locate even minor leaks that are not visible.
A more advanced method involves ultraviolet (UV) dye testing. In this process, a fluorescent dye is introduced into the system. When the system runs, the dye circulates with the refrigerant, and any leaks can be identified using a UV light. This approach is ideal for detecting hidden leaks that are difficult to pinpoint with other methods.
Technicians often use a combination of methods to ensure accurate leak detection before proceeding with repairs.
Preparing the System for Leak Repair
Before any repair work can begin, it is important to prepare the system to ensure safety and compliance with environmental standards. First, the unit must be switched off and allowed to stabilize. Certified refrigerant recovery equipment is then used to safely remove any remaining refrigerant from the system.
Safety precautions are critical because refrigerants can cause frostbite on skin contact and respiratory irritation if inhaled. Wearing gloves, safety glasses, and proper work attire is essential. The area of the leak is cleaned and dried to ensure that repair materials bond properly and to prevent contamination inside the system.
This preparation stage ensures that the repair process is smooth, safe, and effective.
Recognizing Symptoms of a Refrigerant Leak
Early recognition is the best defense against costly repairs. Some of the most common symptoms include:
Reduced Cooling Performance: The air conditioner struggles to maintain the desired temperature, especially during peak heat.
Unusual Energy Consumption: The system runs longer to compensate for lost refrigerant, resulting in higher utility bills.
Ice Formation: Low refrigerant pressure causes evaporator coils to drop below freezing, leading to ice buildup.
Hissing or Bubbling Noises: These sounds indicate that gas is escaping from a line or fitting.
Presence of Oil Stains: Refrigerant leaks often carry a trace of compressor oil, which can appear as greasy spots on lines or near connections.
Identifying these signs promptly ensures that minor leaks are repaired before they escalate into system-wide damage.
Professional Techniques for Detecting Leaks
Leak detection can range from simple visual inspection to advanced diagnostic methods. HVAC professionals rely on several key techniques:
Visual Inspection: Technicians first check for oil stains, frost accumulation, or corrosion spots that can indicate a leak.
Soap Bubble Test: A soap-water solution is applied to suspicious areas. Escaping gas creates visible bubbles, confirming a leak.
Electronic Leak Detectors: These devices are designed to detect minute traces of refrigerant in the air, providing precise detection even in concealed areas.
Ultraviolet Dye Testing: A UV-reactive dye is added to the system. Under ultraviolet light, any leaks become visible as the dye escapes with the refrigerant.
Nitrogen Pressure Test: In cases of hard-to-find leaks, the system may be pressurized with dry nitrogen. Technicians then monitor pressure levels to identify drop points indicating leakage.
Using a combination of these methods ensures thorough leak detection, even in complex or hidden system layouts.
Preparing the System for Leak Repair
Before any repair can take place, proper preparation is essential to ensure safety and compliance with environmental standards.
First, the unit must be powered off, and any remaining refrigerant must be recovered using certified recovery equipment. This step is required to prevent the release of harmful gases into the atmosphere and to comply with environmental regulations.
The technician then inspects the affected area closely, removing dirt, oil, and frost to ensure a clean surface for repair. Wearing safety gear, including gloves and protective eyewear,Post Category, is critical because direct exposure to refrigerant can cause frostbite or respiratory irritation.
Once the system is fully depressurized and the leak area is exposed, the repair process can begin.
Repairing Refrigerant Leaks Professionally
The method of repair depends on the leak’s location and severity.
Brazing and Soldering for Copper Lines: Small holes or cracks in copper lines can be sealed using a brazing torch and filler metal. This method provides a permanent, pressure-resistant seal.
Component Replacement: If the leak is caused by a faulty valve, connector, or severely corroded section, replacing the damaged component is often the most reliable solution.
Evaporator or Condenser Coil Replacement: In cases where leaks are widespread or occur in inaccessible areas, coil replacement ensures long-term reliability.
After repairs, the system is vacuumed to remove moisture and air, both of which can cause internal corrosion or reduce efficiency. Finally, the refrigerant is recharged according to the system’s specifications, restoring its cooling capacity.
Techniques for Repairing Refrigerant Leaks
The method used to repair a refrigerant leak depends on the type and severity of the damage. For small leaks in copper tubing, brazing or soldering is a common technique. This involves heating the damaged section and applying a filler material that seals the hole permanently.
In cases where leaks occur at threaded connections or fittings, tightening or replacing the faulty component may resolve the issue. If the leak is caused by corrosion or cracks in the evaporator coil, replacement of the coil might be necessary.
After completing the repair, the system must be vacuumed to remove moisture and air, as these can harm the compressor and reduce cooling efficiency. The system is then recharged with the correct type and amount of refrigerant according to manufacturer specifications.
Testing the System After Repair
Once the repair is complete, thorough testing is essential to confirm that the leak has been successfully resolved. A pressure test is usually conducted to ensure that the repaired section is fully sealed. The system is then run under normal operating conditions, and performance indicators like temperature output and pressure readings are monitored.
Technicians observe the system for any abnormal noise, vibration, or signs of reduced cooling. Post-repair monitoring ensures that the system is stable and efficient before it is returned to regular operation.
Preventing Future Refrigerant Leaks
Prevention is always more cost-effective than repair. Scheduling routine maintenance is the most reliable way to avoid refrigerant leaks. Professional maintenance involves inspecting refrigerant levels, checking coil and line conditions, and tightening loose connections.
Protecting refrigerant lines from physical damage, installing vibration absorbers, and keeping the system clean can significantly reduce the likelihood of leaks. Properly charging the system with the correct refrigerant quantity also minimizes the strain on components, reducing the risk of future leaks.
Environmental and Safety Responsibilities
Handling refrigerants comes with serious environmental responsibilities. Many types of refrigerants can harm the ozone layer or contribute to global warming if released. Professional leak repair always includes proper refrigerant recovery and disposal in compliance with local environmental regulations.
From a safety perspective, minimizing exposure to refrigerants is crucial. Technicians must always use certified equipment and personal protective gear to ensure that the repair process is both safe and environmentally responsible.