When an oven stops heating properly, one of the most common culprits is faulty wiring connected to the heating element. Over time, the wires that supply electricity to the element can burn out, fray, or lose their connection due to heat stress and regular use. Knowing how to replace oven element wiring can save you money on service calls and help extend the life of your appliance. However, this task requires careful handling, safety awareness, and an understanding of basic electrical systems.
In this guide, we will explore the process of diagnosing wiring issues, preparing for the repair, and carrying out the replacement step by step. While the repair itself is straightforward, safety remains the most important part of the process. This article aims to provide professional yet accessible guidance for homeowners, DIY enthusiasts, and technicians who want to tackle the issue with confidence.
Understanding Oven Element Wiring and Its Importance
Oven element wiring connects the main power supply to the heating element, allowing electricity to flow and generate heat. Without secure, intact wiring, the heating element cannot function properly. In many cases, wiring damage occurs at the connection points where wires meet the element’s terminals. These terminals endure repeated cycles of heating and cooling, which can eventually cause loose connections, arcing, or burnt wire insulation.
Damaged wiring is not just an inconvenience; it can pose a fire hazard if left unaddressed. Signs of faulty oven wiring may include uneven heating, sparking, or a burnt smell coming from the back of the appliance. Recognizing these early warnings is key to preventing further damage.
Safety Precautions Before Handling Electrical Components
Before attempting any repair on an oven, safety must come first. Ovens operate on high voltage, and mishandling wiring could result in severe injury. The first and most essential precaution is disconnecting the appliance from the power supply. For electric ovens, this means switching off the breaker that powers the unit or unplugging it if accessible.
Once power is disconnected, allow the oven to cool completely. Heating elements and wires can retain heat for an extended period, and attempting a repair while the oven is warm can result in burns. Safety gloves, protective eyewear, and insulated tools are highly recommended for this type of repair.
Diagnosing Wiring Issues in an Oven Element
Before replacing wiring, it is important to confirm that wiring is indeed the issue. Sometimes, the heating element itself fails, and replacing wiring alone will not resolve the problem. To check this, remove the element carefully and examine the wires. If the wires appear charred, brittle, or broken near the terminals, they are likely the source of the failure.
A multimeter can also help diagnose wiring continuity. By testing the wires for resistance, you can confirm whether electricity can flow through them. If resistance is infinite or the reading fluctuates, replacement is necessary. Identifying whether the problem lies with the element, the wiring, or the oven’s control system ensures you apply the right solution.
Preparing Tools and Replacement Parts for the Job
Successful repairs begin with preparation. You will need a few key tools: a screwdriver to remove panels and the element, pliers to handle connections, and a multimeter for electrical testing. Heat-resistant replacement wires and high-temperature connectors are essential for this repair. Using ordinary wires or connectors not rated for oven use can lead to early failure and safety hazards.
Replacement wiring kits are often available from appliance parts suppliers. These kits typically include high-temperature wires with pre-installed terminals designed for heating elements. Choosing a kit specific to your oven model ensures proper fit and performance.
Accessing the Heating Element and Wiring Safely
Most ovens allow access to the heating element from inside the cooking chamber. After ensuring the appliance is disconnected, remove the screws securing the element at the back wall. Gently pull the element forward to expose the wires attached to its terminals. Be careful during this step, as wires can retract into the oven cavity if released suddenly.
In some ovens, it may be necessary to remove the back panel for better access to wiring connections. Each model varies, so consulting the user manual or a technical guide for your appliance can clarify the best approach.
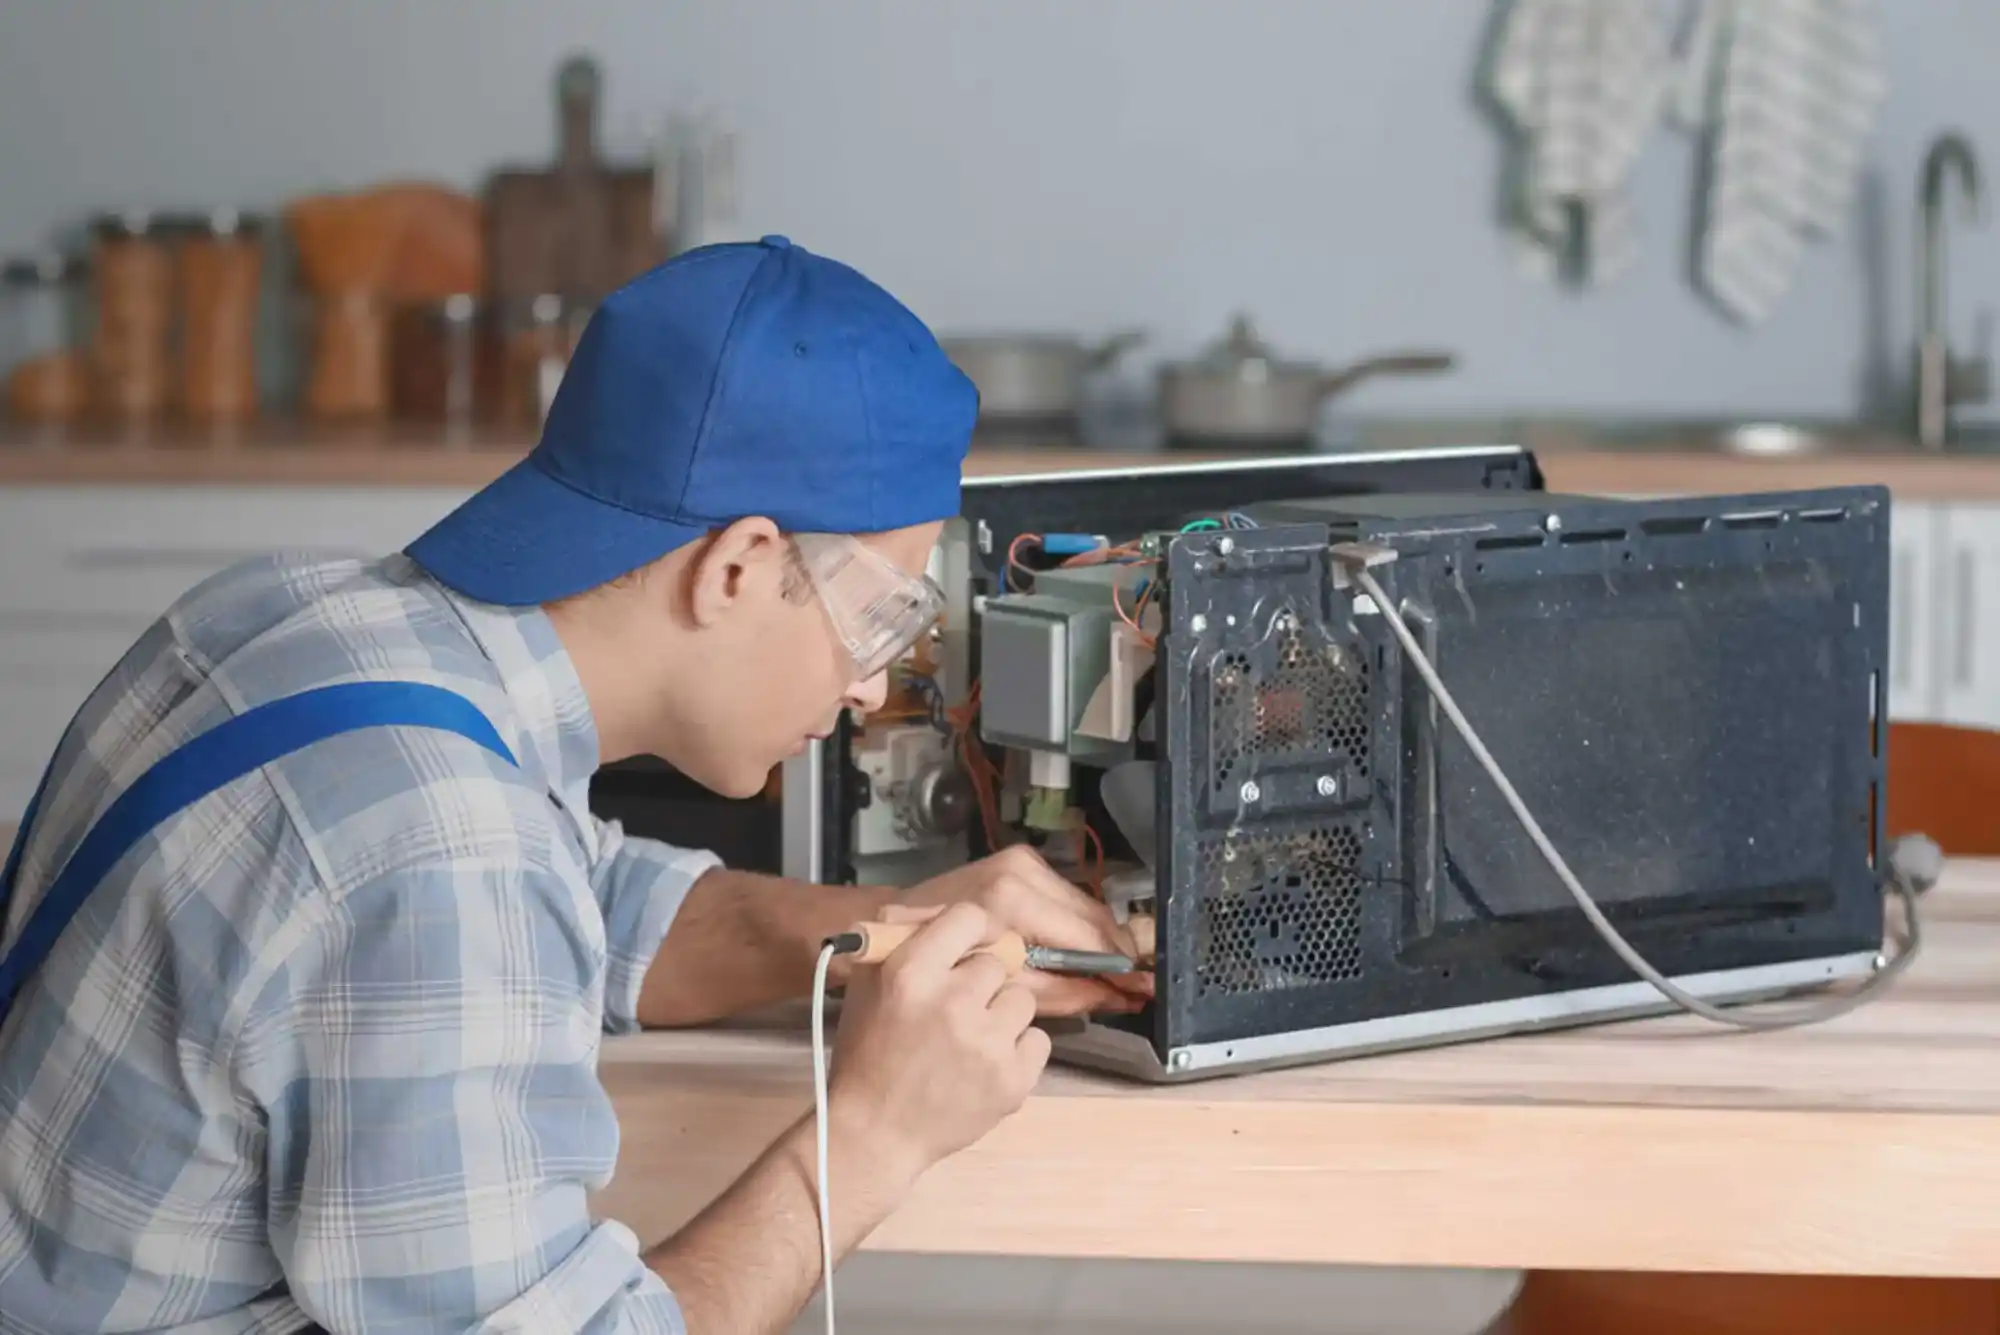
Removing Damaged Wiring from the Heating Element
Once the wires are exposed, inspect them closely. Burnt or frayed wires should be detached by carefully pulling off the metal connectors at the element terminals. If the connectors are stuck due to heat corrosion, use pliers with gentle pressure to remove them. Avoid pulling on the wire insulation directly, as this can cause further damage.
After removing the faulty wiring, check the surrounding area for signs of heat damage. Sometimes, the terminal block or insulation around the cavity can also show wear, which may require additional repairs. Ensuring a clean and secure connection point is critical before installing the new wiring.
Installing New Wiring with Secure Connections
To install the replacement wiring, slide the new high-temperature connectors onto the heating element terminals. The connectors should fit snugly to ensure consistent electrical contact. Loose connections can lead to sparking or repeated wire failure, so press firmly until the connector locks in place.
When routing the new wires, ensure they are positioned away from sharp edges or areas where they may be pinched during reassembly. Heat-resistant sleeves or clips can help protect the wires from future wear. Good wire management is as important as making the connection itself.
Testing the Repair Before Reassembly
After installing the new wiring, but before fully reassembling the oven, it is wise to test the repair. With the wires securely connected, restore power temporarily and switch on the oven. Observe the heating element as it powers up. It should glow evenly without sparking, flickering, or unusual smells.
If the element heats consistently, switch off the power again before final reassembly. If issues remain, recheck the connections and ensure the wires are firmly attached. In rare cases, the problem may involve the oven’s control board or fuse, which may require professional service.
Completing Reassembly and Final Checks
Once testing confirms successful operation, secure the heating element back in place with the mounting screws. Replace any panels or covers removed during the process. Double-check that all screws are tightened and that no wires are exposed or pinched.
After reassembly, restore power permanently and run the oven through a short heating cycle. This final test ensures not only that the repair was successful but also that the oven is safe to use for regular cooking tasks.
Common Mistakes to Avoid During Oven Wiring Replacement
One frequent mistake is failing to disconnect power before beginning the repair. Even if the oven appears off, residual current can pose a risk. Another error is using standard electrical wires instead of heat-rated replacements. These wires cannot withstand oven temperatures and will quickly fail.
In addition, skipping the testing step before reassembly may lead to repeated disassembly if a connection is loose or improperly installed. Taking time to test midway can prevent frustration later. Careful attention to detail at every stage ensures a long-lasting repair.
When to Call a Professional Technician Instead
While replacing oven element wiring is manageable for many homeowners, some situations warrant professional help. If wiring damage extends beyond the element to the oven’s main harness, replacing it may involve extensive disassembly. Similarly, if control boards or high-voltage circuits appear affected, a certified technician is the safest choice.
Calling a professional is also recommended if you feel uncertain about handling electrical components. Safety should always take priority over cost savings. Knowing your limits is part of being a responsible DIY repairer.
Extending the Lifespan of Oven Wiring
Preventive care can help extend the lifespan of oven element wiring. Regularly cleaning the oven reduces residue buildup, which can contribute to overheating. Avoid overloading the oven with heavy cookware, as this stresses both the element and its connections. Periodic inspections of the element and wiring can catch early signs of wear before they escalate into major issues.
Using the oven within its designed temperature limits also prevents unnecessary strain on components. With these habits, you can minimize the frequency of wiring replacements and keep your appliance reliable for years.
Restoring Function and Safety with Proper Repair
Replacing oven element wiring is a practical repair that restores both functionality and safety to your appliance. With the right tools, preparation, and careful attention to safety, this task is accessible to many homeowners. From diagnosing wiring damage to making secure connections, each step contributes to a reliable outcome.
A well-executed repair not only brings your oven back into service but also reduces the risk of electrical hazards. Whether you complete the repair yourself or seek professional assistance, understanding the process empowers you to make informed decisions about your appliance. By addressing wiring issues promptly and correctly, you ensure that your oven continues to serve as a dependable cornerstone of your kitchen.